
Roof installation is a significant undertaking. It's a process that requires careful planning and skilled execution.
As a homeowner, you may feel overwhelmed. You might wonder what to expect during this complex project.
This guide is here to help, walking you through the roof replacement and installation process, step by step.
You'll learn about choosing the right roofing contractors and preparing for the installation. We'll also cover the timeline and the different stages of the project.
By the end, you'll have a clear understanding of what roof installation entails and be better prepared to make informed decisions.
So, let's dive in and demystify the process of roof installation.
Understanding the Roof Installation Process
A roof installation is a methodical and detailed process. Understanding its stages helps in setting realistic expectations.
First, the condition of the roof is assessed. This involves a thorough inspection to identify any underlying issues.
Next, decisions about roofing materials must be made. Options include shingles, metal, or tiles, each with pros and cons.
Finally, the actual installation starts. This involves removing old materials, preparing the roof deck, and installing the new roof. This step-by-step approach ensures a durable and robust roofing system.
Preparing for Roof Installation
Getting ready for a roof installation involves several important steps. Proper preparation ensures a smoother process and minimizes surprises. Homeowners should start by coordinating with their roofing contractor on the necessary preparations.
Understanding local regulations is vital. You may need permits or inspections before installation begins. Your contractor can often assist with these requirements to ensure compliance. Confirm the installation schedule and discuss any potential weather impacts with the contractor.
Additionally, prepare your property to accommodate the roofing crew. Consider the following steps to ease the process:
- Clear driveways and access points.
- Move outdoor furniture and delicate plants.
- Ensure safe access to power outlets, if needed.
Taking these measures helps the installation progress efficiently. It also reduces the risk of property damage during the project.
Securing Permits and Inspections
Securing permits and scheduling inspections are vital steps in the roof installation process. They ensure that your project meets local building codes and standards.
Contact your local building authority to determine the specific permits required. While your contractor may assist, you should still understand these requirements. Permits are crucial, especially for roofing projects involving significant changes or replacement.
Inspections may occur before, during, and after the installation. This ensures that the work complies with safety and building standards. It also protects you from potential legal and financial issues.
Preparing Your Property
Preparing your property ensures minimal disruptions during roof installation. Start by clearing your driveway and nearby areas. This provides easy access for the roofing crew and their equipment.
If possible, relocate vehicles and outdoor items such as furniture or plants. Protect delicate items from potential damage. This precaution also allows the crew to move freely and safely.
Inside the home, consider covering items in the attic. Dust and debris may filter down as work progresses. These steps help protect your property and reduce stress during the installation.
The Roof Installation Timeline

Understanding the timeline for roof installation helps set realistic expectations. Most installations take several days, depending on the project's scope. Discuss timelines with your contractor to prepare for potential changes.
A typical roof installation follows several key stages:
- Project setup: Equipment delivery and crew briefing.
- Roof removal: Removing old materials and preparing the deck.
- Installation: Laying underlayment, materials, and sealing.
- Finishing touches: Completing flashing, ventilation, and cleanup.
- Final checks: Conducting final inspection and ensuring satisfaction.
Weather and unforeseen issues can impact the timeline. Clear communication with your contractor helps address delays promptly. Being aware of the timeline helps you manage day-to-day disruptions better and plan activities around the installation.
Step 1: Removing the Old Roof
The first step in roof installation involves removing the existing roofing materials. This step is crucial for the successful installation of the new roof. Roofing contractors carefully strip away old shingles and underlayments.
Removing the old roof exposes the roof deck for inspection. This process allows the identification of any damage that needs repair before proceeding. A clean and sound deck is vital for the new roofing materials to adhere correctly. Ensuring proper disposal of the old materials is also part of this stage, which helps maintain a tidy work site.
Step 2: Inspecting and Preparing the Roof Deck
Once the old roof is removed, the roof deck is ready for a thorough inspection. This step involves checking for any signs of rot, mold, or structural damage. Any problematic areas identified will require repairs or replacements to ensure a strong foundation.
Preparing the roof deck means ensuring it is clean and dry. This preparation helps in the proper application of underlayment and roofing materials. The importance of a well-prepared roof deck cannot be overstated, as it supports the entire roofing system, ensuring long-term durability and performance.
Step 3: Installing Underlayment and New Roofing Material
After preparing the roof deck, the next step is installing the underlayment. This critical layer acts as a protective barrier against moisture, safeguarding your home from water damage. Roofing contractors will typically use traditional felt or modern synthetic options.
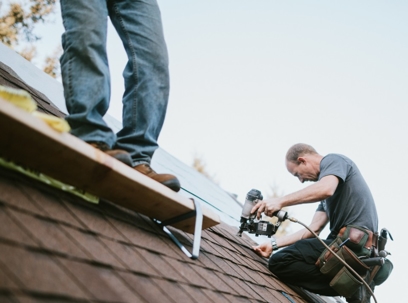
Following the underlayment installation, the new roofing material takes center stage. Shingles, tiles, or metal panels are carefully arranged and secured to the roof deck. This process requires precision to ensure proper alignment and maximize the roof's aesthetic appeal and functionality.
Contractors pay attention to details like proper nailing techniques and maintaining consistent spacing. Proper installation ensures the roof can withstand the elements and provide lasting protection. This part makes your roof look complete and ready to tackle any weather.
Special Considerations for Metal Roofing
Metal roofing requires unique considerations compared to other materials. Due to its lightweight and durable nature, installing metal roofs involves specific techniques to ensure secure attachment and proper sealing.
Contractors must pay particular attention to expansion and contraction, which metal is prone to as temperatures fluctuate. Additionally, insulation and soundproofing may also need to be addressed to mitigate noise concerns, ensuring a comfortable indoor environment.
Step 4: Flashing, Ventilation, and Sealing

Flashing is crucial for preventing leaks where the roof meets walls, chimneys, or vents. Roofing contractors carefully install metal flashing, bending and securing it to ensure a watertight seal. This step protects vulnerable areas from water infiltration, enhancing the roof’s durability.
Ventilation is equally important, allowing hot air to escape and reducing moisture buildup. Proper ventilation extends the roof’s life and improves energy efficiency. Finally, sealing involves applying specialized sealants to potential leak points, adding an extra layer of protection. These measures ensure your roof performs optimally under diverse weather conditions.
Step 5: Cleanup and Waste Disposal
After the roof installation, a thorough cleanup is crucial. Roofing crews remove all debris, ensuring your property looks tidy. This includes old shingles, nails, and other materials.
Proper waste disposal follows local regulations, often involving transportation to a designated facility. Some roofing companies even recycle materials, contributing to environmental conservation. A clean site ensures safety and marks the completion of a successful roofing project.
Step 6: Final Inspection and Warranty Registration
Once the roof is in place, a final inspection is essential. This step ensures everything meets quality standards and no issues are present. The roofing contractor typically conducts this inspection alongside the homeowner.
Following the inspection, it's crucial to register your warranty. This documentation safeguards your investment and provides peace of mind. Warranties cover materials and labor, offering protection against future issues.
Maintaining Your New Roof

Proper maintenance extends the life of your new roof and preserves its condition. Routine inspections help identify minor issues before they become major concerns. Schedule inspections twice a year and after severe weather events.
Keeping your roof in top shape involves a few simple tasks. Here’s a list to guide you:
- Clear debris from gutters to ensure proper drainage.
- Trim overhanging branches to prevent damage.
- Inspect seals and flashing for signs of wear.
- Check for missing or damaged shingles.
- Clean moss and algae to prevent surface damage.
By following these steps, you'll maintain your roof's integrity and ensure it protects your home for years.
Ensuring a Smooth Roof Installation Experience
Successfully navigating a roof installation involves understanding the process and preparing adequately. By choosing reliable roofing contractors and ensuring clear communication, you set the stage for a hassle-free experience.
Remember, your involvement doesn’t end once the roof is installed. Maintenance plays a critical role in prolonging the roof's lifespan and preventing costly repairs. Regular inspections and upkeep are keys to preserving your investment and keeping your home safe and secure. With these insights, you’re well-prepared for a smooth roofing journey.
For expert residential roofing services in Fort Myers, contact Mighty Dog Roofing today! Schedule your free inspection with our roofing contractors today.