Many homeowners only see the finished gutter system.
They see the clean metal line along the edge of the roof, the downspout running along the wall, and the final result once everything is in place.
What they usually do not see is the amount of planning, measuring, fabrication, lifting, securing, sealing, and testing required to make that system work properly.
A professional gutter installation is not simply about attaching a piece of metal to a building. It is about creating a drainage system that safely moves water away from the roof, walls, foundation, walkways, and vulnerable areas of the property.
When done correctly, gutters help protect a home or building from water damage. When done poorly, they can create leaks, overflow, staining, structural problems, and expensive repairs.
In this real project breakdown, we will walk through what goes into a professional gutter installation and why the process matters.
Why Gutters Matter
Gutters are designed to collect water from the roof and move it away from the structure.
That may sound simple, but water management is one of the most important parts of protecting a property. Even small amounts of repeated water exposure can cause long-term damage.
A properly installed gutter system can help prevent:
Water pooling near the foundation
Staining on exterior walls
Roof edge deterioration
Water intrusion near fascia or roof transitions
Soil erosion around the property
Damage to walkways, patios, and landscaping
Premature wear on exterior surfaces
In areas like El Paso, gutters also need to be prepared for sudden heavy rain. Even if the area does not receive constant rain throughout the year, storms can create fast-moving roof runoff. A gutter system must be strong enough, properly sloped, and correctly connected to handle that water safely.
That is why professional installation matters.
Step 1: Evaluating the Roofline and Drainage Needs
Every professional gutter installation starts with understanding the structure.
Before installation begins, the team must evaluate the roofline, roof edge, drainage points, and surrounding conditions. This includes identifying where water naturally flows and where it needs to be redirected.
On this type of project, the roof area and building layout require a gutter system that can collect runoff along a long roof edge and move that water toward the proper drainage points.
Important questions include:
Where does the roof naturally drain?
How long is the roof edge?
Where should the water exit?
Are there existing drains or downspouts?
Are there walls, walkways, patios, or neighboring structures nearby?
Are there utility lines, pipes, or other obstacles?
How much support will the gutter need when full of water?
This step is critical because gutters must be designed around the actual building. A professional installer is not just looking at where to place the gutter. They are looking at how the entire drainage system will perform during real weather conditions.
Suggested image placement:
Insert a wide project photo showing the full roof edge and installed gutter line.
Step 2: Measuring and Planning the System
Accurate measurement is one of the most important parts of the job.
Gutters must be sized and positioned correctly. If they are too small, they may overflow. If they are poorly aligned, water may sit inside the gutter instead of flowing to the drainage point. If they are not properly supported, they can sag, pull away from the structure, or fail over time.
During the planning stage, the team determines:
The gutter length
The required slope
The location of supports
The connection points
The downspout or drain location
The type of metal or gutter profile needed
The number of seams or transitions
Any custom pieces required
Even a slight error in slope or alignment can affect performance. Water should not sit inside the gutter for long periods. It should move efficiently toward the outlet.
This is one reason professional installation carries value. The finished system may look simple, but the measurements behind it determine whether it actually works.
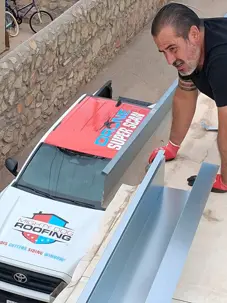
Step 3: Fabricating the Gutter Components
Not every gutter installation uses standard off-the-shelf parts.
In this project, the gutter system appears to use custom metal sections designed to fit the specific building. Custom fabrication allows the system to match the roof edge, create a cleaner fit, and handle the unique conditions of the property.
Fabrication may include:
Cutting gutter sections to length
Forming metal into the correct profile
Preparing end caps
Creating corner or transition pieces
Making room for outlets or drainage connections
Ensuring seams fit correctly
Custom metal work requires skill because the pieces must be straight, durable, and shaped correctly. A poorly formed gutter can affect flow, appearance, strength, and long-term performance.
Suggested image placement:
Insert the photo showing the metal gutter sections staged on the roof before final placement.
Step 4: Working Safely at Height
Gutter installation often requires working along roof edges, ladders, scaffolding, or elevated platforms.
This is one of the most overlooked parts of the job. From the ground, gutter installation may look easy. But once the work is happening several feet above the ground, the complexity changes.
Professional crews must manage:
Safe access to the work area
Tools and materials at height
Long metal sections that can bend or shift
Wind exposure
Roof edge safety
Proper footing
Coordination between crew members
The photos from this project show the use of elevated work platforms and rooftop access. That matters because safe access allows the team to work more accurately and reduces the risk of accidents.
A professional installation is not just about the final product. It is also about completing the job safely.
Step 5: Positioning the Gutter Correctly
Once the gutter sections are ready, they must be positioned along the roof edge.
This step requires careful alignment. The gutter needs to sit in the correct location to collect water coming off the roof while maintaining the proper slope toward the drainage outlet.
If the gutter is too high, water may overshoot it. If it is too low, water may run behind it. If it is not aligned properly, water may pool or overflow.
The installer must consider:
Roof edge height
Water flow direction
Wall clearance
Connection to the building
Slope from one end to the other
How the gutter will perform when full of water
This is where experience matters. A gutter system must look clean, but it must also function under real conditions.
Suggested image placement:
Insert a photo showing the long gutter line installed along the roof edge.
Step 6: Installing Structural Supports
One of the biggest misconceptions about gutters is that they are lightweight and simple.
An empty gutter may not seem heavy, but a gutter full of water can place significant stress on the system. Add debris, wind, expansion, and repeated weather exposure, and the importance of proper support becomes clear.
This project shows metal brackets and support components installed along the gutter line. These supports help carry the load and keep the gutter secured to the structure.
Proper supports help prevent:
Sagging
Pulling away from the building
Poor drainage
Separated seams
Overflow points
Long-term metal fatigue
A professional gutter installation requires the correct number of supports, properly spaced and securely fastened.
If the supports are weak, the gutter system may look fine at first but fail during heavy rain.
Suggested image placement:
Insert the close-up photo of the metal support bracket attached to the gutter.
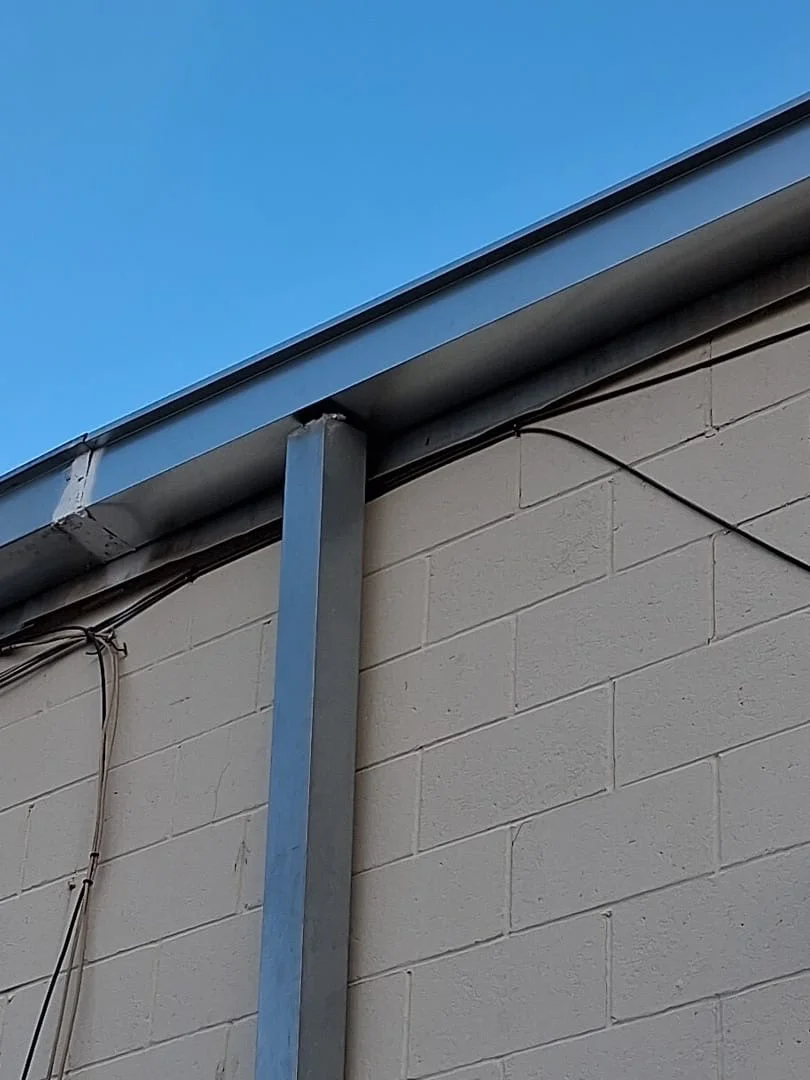
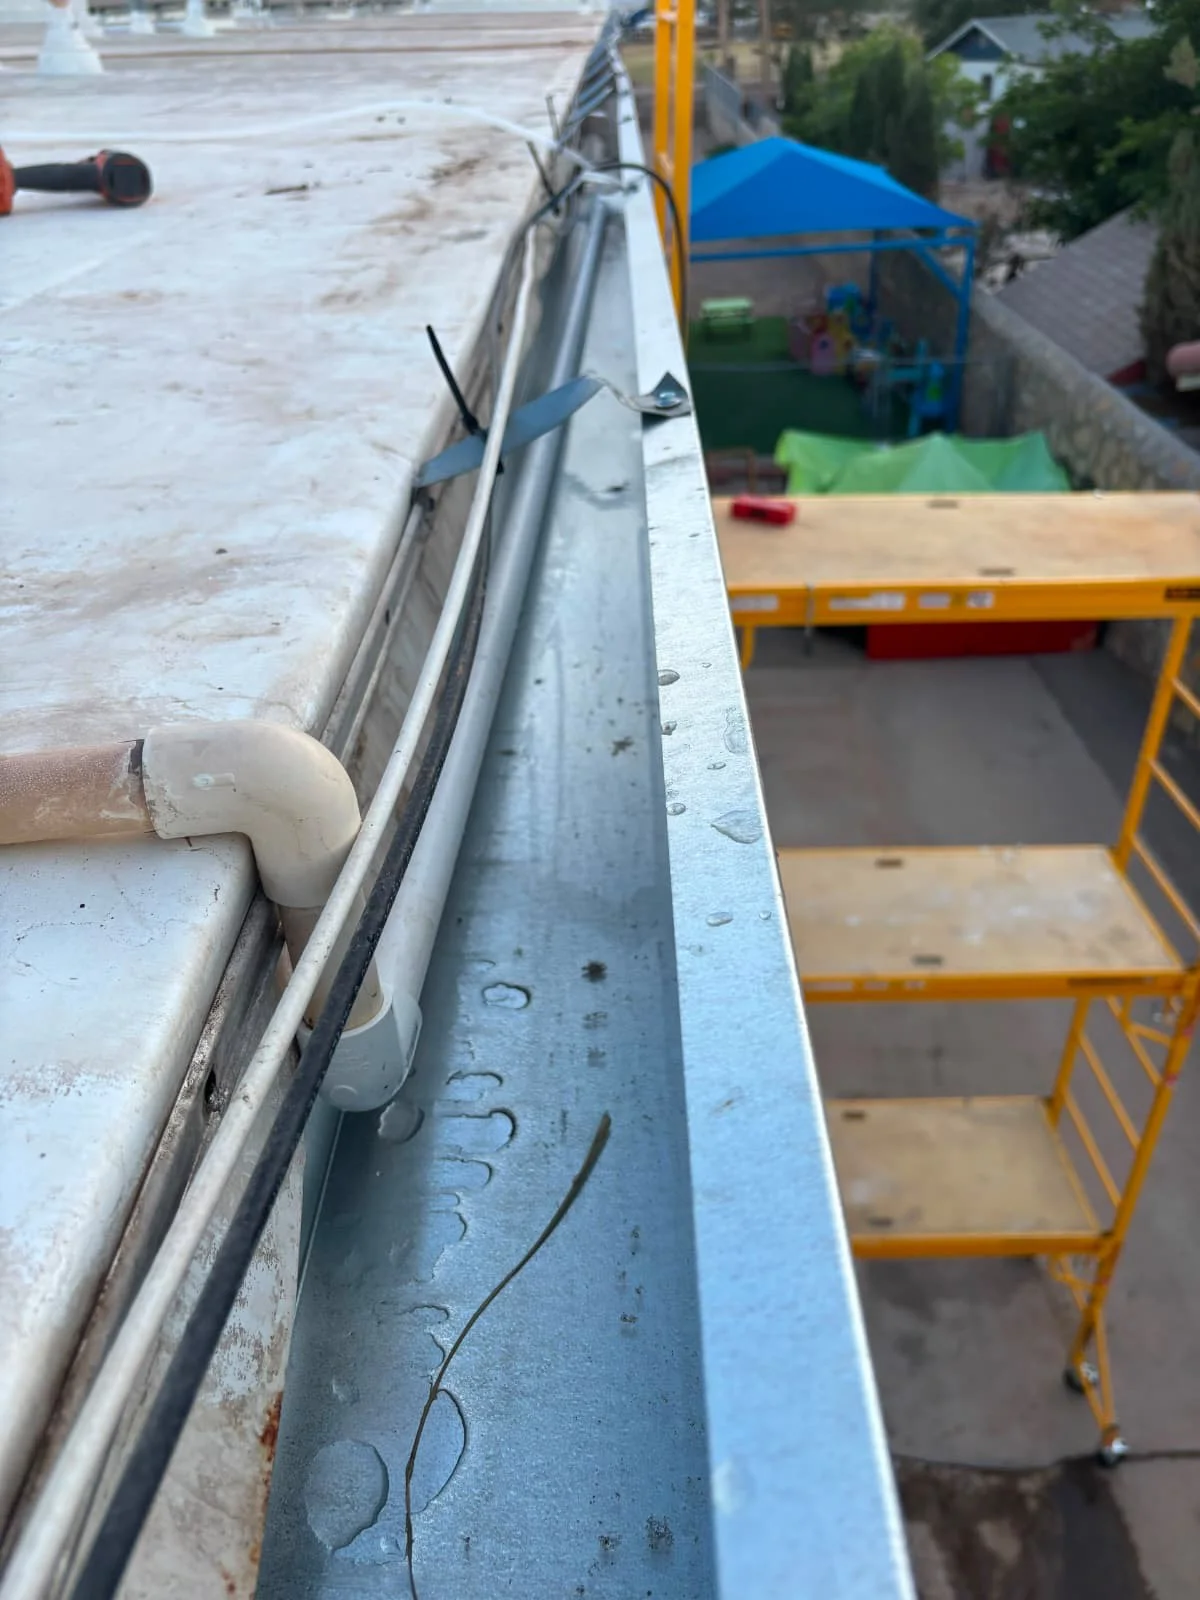
Step 7: Integrating Existing Pipes, Wires, and Building Conditions
Real-world gutter installations are rarely performed on a perfect, empty structure.
Most buildings already have pipes, wires, drains, vents, roof penetrations, walls, parapets, or other obstacles that must be worked around carefully.
In this project, the photos show existing PVC lines, wiring, and roof-edge details near the gutter system. This is important because the crew cannot simply install the gutter in isolation. They must integrate it into the existing conditions without damaging other systems.
This may require:
Working around existing pipes
Protecting wires or cables
Avoiding damage to roof membranes
Keeping drainage paths clear
Coordinating gutter outlets with existing drainage
Creating clean transitions around obstacles
This is another reason professional installation is valuable. The job is not only about installing the gutter. It is about making the new system work with everything already on the building.
Step 8: Connecting the Drainage System
A gutter is only useful if the water has somewhere to go.
Once water enters the gutter, it must be directed toward an outlet, downspout, or drainage point. If the exit point is poorly placed or restricted, the system may overflow or back up.
In the photos, the gutter system appears to connect with existing drainage and downspout components. This type of integration must be handled carefully because the connection point is one of the most important parts of the entire system.
A professional crew checks:
Outlet placement
Pipe alignment
Water flow direction
Secure connections
Clear drainage paths
Potential clog points
Proper discharge away from the building
The goal is not just to collect water. The goal is to move water safely away from areas where it can cause damage.
Step 9: Sealing Joints, Penetrations, and Vulnerable Areas
Sealing is one of the most critical parts of gutter installation.
Any joint, seam, outlet, or transition can become a future leak point if it is not properly sealed. Water will always find the weakest area. That is why professional crews pay close attention to details that may not be obvious to the homeowner.
Sealing may be required around:
End caps
Seams
Corners
Outlet connections
Fastener points
Roof penetrations
Drain transitions
A good seal helps prevent water from escaping behind the gutter, entering the building envelope, or damaging nearby materials.
This is especially important on flat or low-slope roof areas, where water may move more slowly and remain near the gutter system longer than it would on a steep roof.
Suggested image placement:
Insert the photo showing sealant around the drainage opening and pipe connection.
Step 10: Checking Slope and Water Flow
After the gutter is installed, the system must be checked for proper water movement.
This is where the installation proves whether the planning was correct.
A gutter should not hold standing water across long sections. Water should move toward the outlet. If the slope is wrong, the gutter may collect debris, overflow, or create long-term corrosion and water issues.
During this stage, the crew checks:
Water direction
Low spots
Standing water
Outlet performance
Support stability
Leaks at seams or joints
Overflow risk
This step is often where a professional installation separates itself from a quick installation. A system should not just be installed; it should be verified.
Step 11: Testing the System
The photos showing water inside the gutter are especially important.
This type of test demonstrates that the system is being checked before the job is considered complete. Water testing allows the team to see whether the gutter collects and moves water correctly.
A water test can reveal:
Leaks
Improper slope
Weak seams
Drainage restrictions
Pooling water
Overflow points
Loose supports
Testing gives the homeowner more confidence because it shows that the system has been evaluated under real conditions.
Suggested image placement:
Insert the photo showing water inside the gutter during the test.
Step 12: Final Review and Cleanup
Once the gutter is installed, connected, sealed, and tested, the crew should perform a final review.
This includes checking the appearance and function of the system. The gutter should be secure, properly aligned, and free of obvious debris. Any tools, screws, scraps, and materials should be removed from the roof and work area.
A professional final review may include:
Checking fasteners
Reviewing seams
Inspecting brackets
Confirming drainage
Cleaning the gutter channel
Removing loose materials
Checking surrounding roof areas
Reviewing the finished work with the customer
The final result should be a gutter system that looks clean and functions properly.
Why Professional Installation Is Worth It
A homeowner may look at a finished gutter and think the job is simple. But as this project shows, a professional gutter installation involves several important stages:
Planning
Measuring
Fabrication
Safe access
Alignment
Structural support
Drainage integration
Sealing
Testing
Final inspection
Each step affects the final performance of the system.
A poorly installed gutter can create more problems than it solves. If water flows behind the gutter, pools in the wrong place, leaks at seams, or overflows near the foundation, the building may still be at risk.
Professional installation helps ensure the gutter system is designed and installed to protect the property properly.
Common Problems Caused by Poor Gutter Installation
When gutters are not installed correctly, homeowners may experience problems such as:
Water overflowing during rain
Leaks near seams or corners
Gutters pulling away from the structure
Standing water inside the gutter
Water staining exterior walls
Drainage near the foundation
Sagging sections
Premature rust or deterioration
Roof edge damage
Mold or moisture concerns
Many of these issues can be avoided with proper planning and installation.
Gutters Protect More Than the Roof
Gutters are often thought of as roof accessories, but they protect much more than the roof.
A well-installed gutter system helps protect:
Exterior walls
Windows and doors
Foundations
Walkways
Driveways
Landscaping
Fascia and trim
Roof edges
Interior spaces
Structural components
Water damage can be expensive, and in many cases, it develops slowly. By the time a homeowner notices staining, cracks, leaks, or pooling water, the problem may already require repairs.
That is why gutters are an important part of a complete exterior protection system.
What Homeowners Should Ask Before a Gutter Installation
If you are considering new gutters, it is helpful to ask the right questions before the work begins.
Important questions include:
What size gutter is recommended for my property?
Where will the water drain?
How will the system be supported?
Will the gutter be custom fabricated?
How will seams and joints be sealed?
Will existing pipes or roof details affect installation?
How will the system be tested?
What maintenance will be required?
A professional roofing and gutter team should be able to explain the process clearly.
How Often Should Gutters Be Inspected?
Gutters should be inspected regularly, especially after major weather events.
Homeowners should watch for:
Clogged sections
Loose brackets
Leaks at seams
Rust or corrosion
Standing water
Overflow during rain
Separated downspouts
Water stains on walls
Debris accumulation
Even a well-installed gutter system needs maintenance. Leaves, dirt, roofing granules, and debris can accumulate over time. Regular inspection helps keep the system functioning properly.
Final Thoughts
A professional gutter installation is more than a simple add-on to a roof.
It is a carefully planned drainage system designed to collect water, direct it safely away from the structure, and protect the property from long-term damage.
From measuring and fabrication to supports, sealing, drainage connections, and water testing, each step plays an important role in the final result.
Many homeowners only see the finished gutter. But behind that clean final look is a detailed process that requires skill, experience, and attention to detail.
If your home or building needs new gutters, repairs, or a professional inspection, Mighty Dog Roofing can help evaluate your property and recommend the right solution.
Call Mighty Dog Roofing today to schedule your gutter or roof inspection and protect your property before water damage becomes a costly problem.