
Most homeowners schedule siding installation without a clear picture of what actually happens once the crew arrives. The process involves more than pulling off old panels and nailing on new ones — and understanding the steps helps you know what to watch for, what questions to ask, and why the job takes as long as it does.
At Mighty Dog Roofing of Greater Chadds Ford, every siding installation follows a defined sequence — not because it's procedural, but because each step depends on the one before it. Skip or rush any phase and the problems show up months or years later, not on installation day. Here's the full process from start to finish.
Before Installation Begins — What Happens First
The Pre-Job Walkthrough
Before a single panel comes off, a thorough walkthrough of the home's exterior establishes the baseline for the entire job. This isn't a formality. What gets documented here determines scope, timeline, and whether any additional work is needed before installation begins.
The crew lead assesses the following during the pre-job walkthrough:
- Existing wall condition — visible damage, soft spots, or areas where moisture has already compromised the sheathing
- Window and door penetrations — how existing trim and flashing are integrated, and what needs to change when new siding goes on
- Trim detail complexity — corners, gable ends, decorative elements, and any custom millwork that affects installation sequence
- Roofline and soffit integration — how siding terminates at the top and whether soffit or fascia work is part of the same scope
Findings from the walkthrough get documented before work starts. At Mighty Dog Roofing of Greater Chadds Ford, homeowners receive written findings from the pre-job assessment — so nothing discovered under the old siding later in the process comes as a surprise without context.
Material Delivery and Staging
Siding materials typically arrive one to two days before installation begins. Panels, trim components, corner posts, J-channel, and accessories are staged around the home in the locations where they'll be used — which reduces crew movement during the job and keeps the installation sequence efficient.
Staging location matters for the property as well. Materials stacked on soft ground or directly against landscaping can cause damage over a multi-day job. A well-organized crew marks staging areas in advance and uses plywood or padding under material stacks to protect lawn and hardscape.
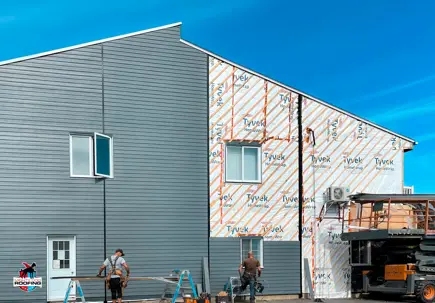
Step 1 — Tear-Off and Wall Inspection
Removing the Existing Siding
Tear-off proceeds section by section, working from top to bottom on each elevation. This sequence keeps debris from falling onto already-cleared wall sections and allows the crew to move staging materials progressively around the home.
Old siding removal generates significant volume quickly. Disposal should be confirmed in the contract before the job starts — whether material goes into an on-site trailer or is hauled separately affects both the pace of the job and the final cost. At Mighty Dog Roofing of Greater Chadds Ford, disposal is included in every siding estimate so homeowners aren't presented with a separate line item after the fact.
Tear-off timeline for a typical Chester County single-family home runs four to six hours depending on siding type, number of stories, and how the original installation was fastened. Homes with multiple layers — new siding installed over old — take longer and often reveal more wall condition issues once everything comes off.
What the Wall Surface Reveals
This is where siding jobs either stay on scope or expand. Once old panels are off, the wall surface tells the real story:
- Moisture barrier condition — intact and functional, damaged in sections, or absent entirely on older homes
- Sheathing condition — soft spots, delamination, or rot in OSB or plywood that must be addressed before new siding goes on
- Previous water intrusion evidence — staining, mold, or compressed insulation visible through gaps in the sheathing
How a contractor handles mid-job findings is as important as the finding itself. At Mighty Dog Roofing of Greater Chadds Ford, any sheathing damage found during tear-off is photographed and presented to the homeowner with a clear scope and cost before repair work begins. No one should be handed a surprise bill at the end of a job for work that happened without their knowledge.
Step 2 — Moisture Barrier and Wall Preparation
Why the Moisture Barrier Is the Most Important Step Nobody Sees
House wrap — the moisture barrier installed over the sheathing before siding goes on — is the most consequential part of the installation that homeowners never see once the job is done. It is the last line of defense between the wall cavity and the water that will inevitably find its way behind the siding over the life of the installation.
A properly installed moisture barrier:
- Overlaps horizontally, with upper layers lapping over lower ones so water runs down and out rather than behind
- Is fastened at the correct spacing to remain taut and wrinkle-free, which affects how water sheds
- Integrates fully with window and door openings — not just stapled to the flat wall field
What a poorly installed moisture barrier looks like doesn't show up on installation day. It shows up five years later as mold on the sheathing, rot at the base of the wall, or interior moisture damage that traces back to a gap at a window corner that was never properly detailed.
Window and Door Integration
Every window and door opening requires flashing — a layered waterproofing detail that directs water away from the opening and out of the wall assembly. This is where most moisture failures originate in residential siding installations, and it's the step most likely to be rushed on a fast-moving job.
Proper flashing at windows includes:
- Sill pan flashing installed before the moisture barrier, sloped to drain outward
- Moisture barrier lapped over the sill and sealed at the corners
- Head flashing at the top of the opening, installed after the moisture barrier and before trim
A crew that applies a bead of caulk around a window frame and calls it flashed is not flashing — it's waterproofing with a material that has a 5–10 year lifespan on a wall assembly that needs to perform for 25. This detail is worth asking about specifically before any siding job begins.
Step 3 — Installing the Siding Panels
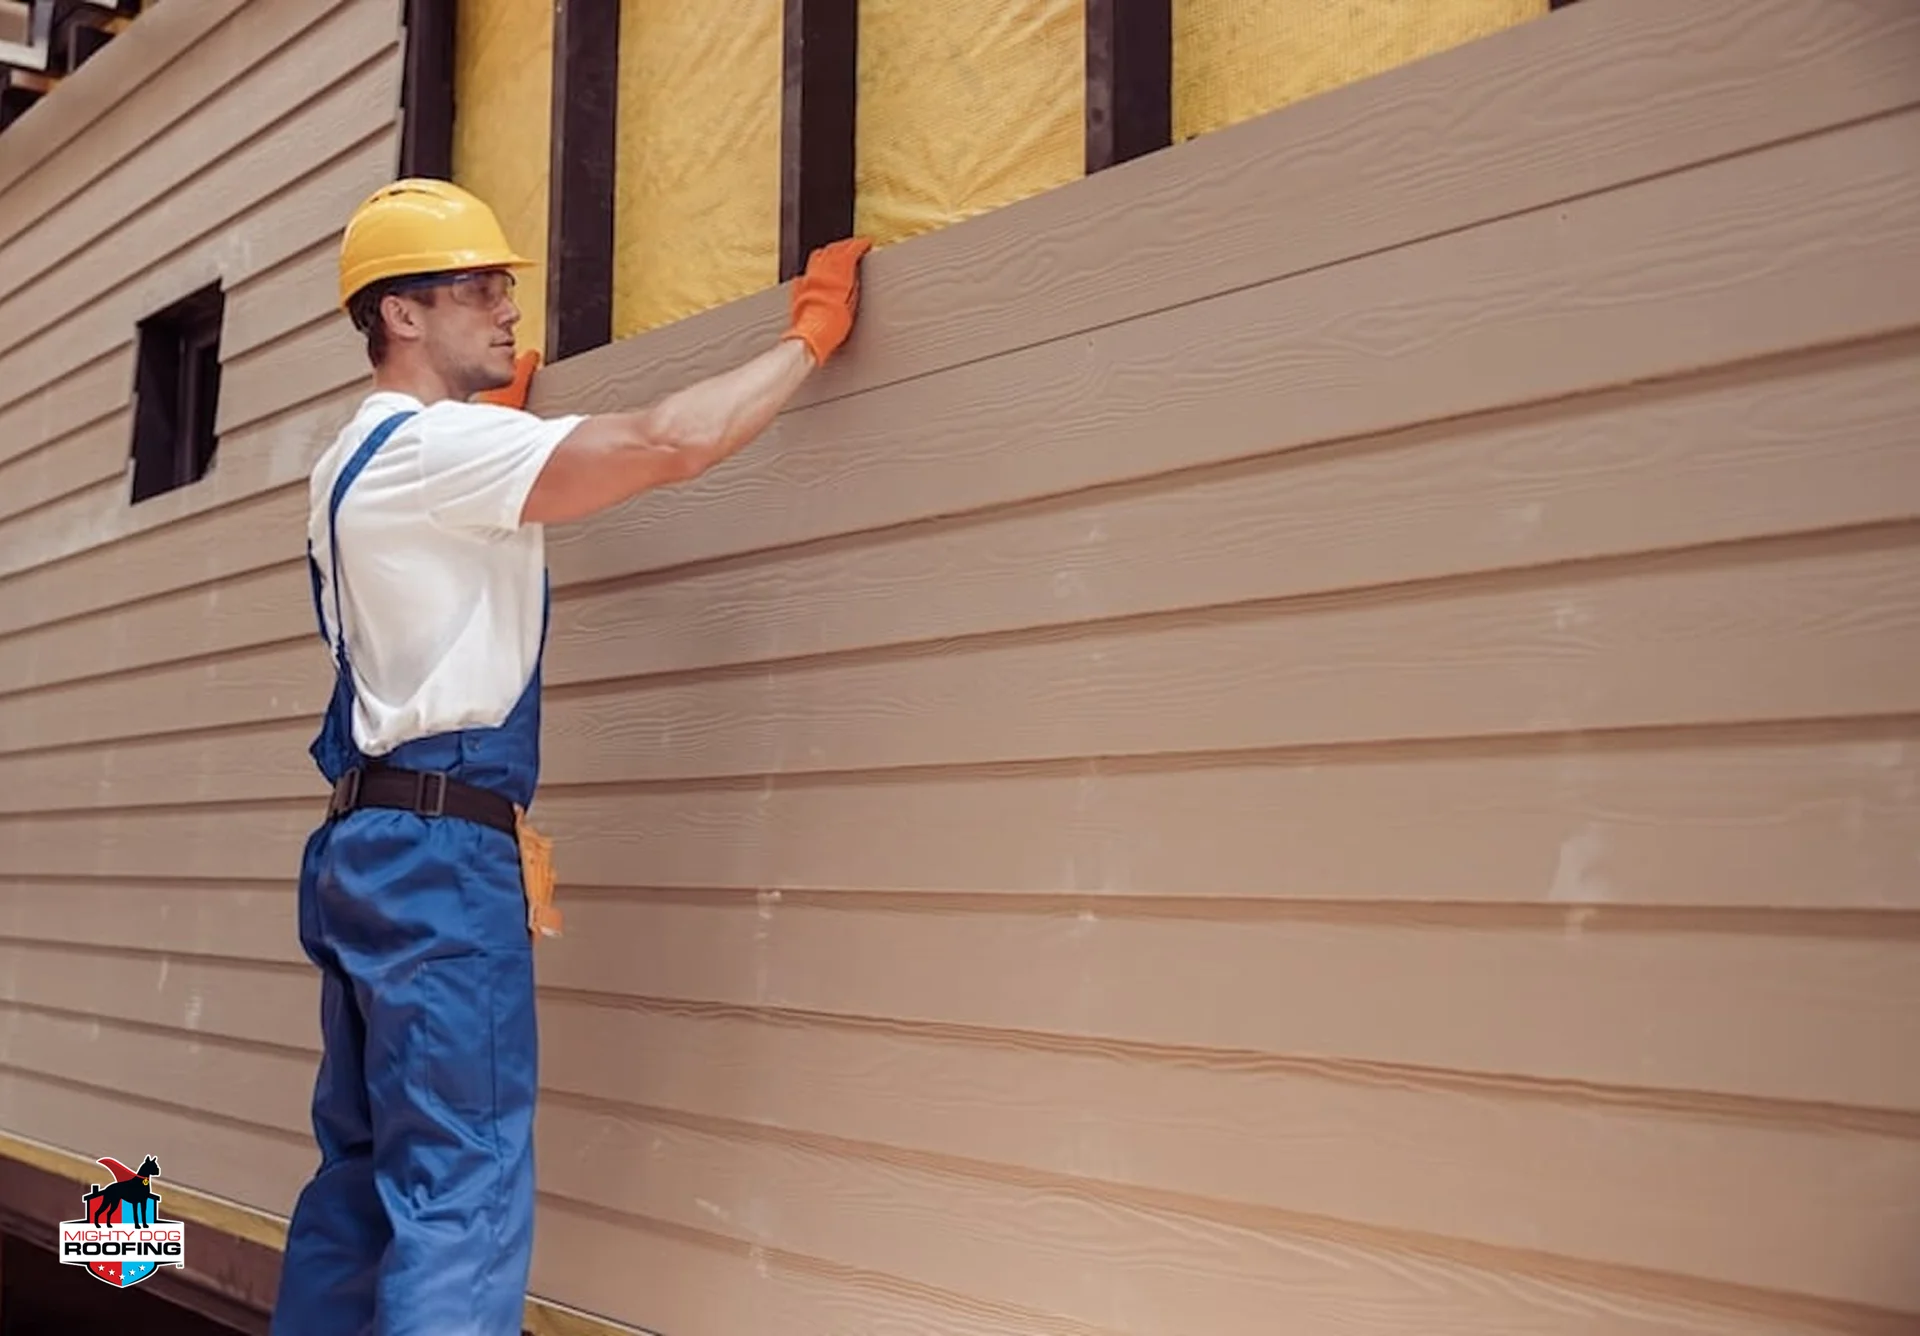
Starting at the Bottom — Why It Matters
The starter strip is the first piece of siding installed and it sets the plane for every row above it. If it's not level, every course above it compounds the error — and by the time you reach the roofline, the misalignment is visible from the street.
On homes with uneven foundation lines — common in older Chester County properties — establishing a true level starting point sometimes means shimming or scribing the first course rather than following the existing grade. This takes more time than simply nailing the starter strip to the wall. It's also the difference between a finished job that looks intentional and one that looks slightly off in a way the homeowner can never quite identify.
Panel Installation — What the Crew Is Doing and Why
Once the starter strip is set, panels go on in horizontal courses, each one lapping over the one below it. What looks like a straightforward nailing process involves several decisions on every row:
- Overlap depth — specified by the manufacturer and affects both appearance and weather resistance
- Nail placement — fasteners go in the nail hem, not driven tight; over-driven nails prevent thermal movement and cause buckling
- Thermal expansion gaps — vinyl expands and contracts significantly with temperature; installation gaps at J-channels and trim pieces must be sized for PA's temperature range, not just the ambient temperature on installation day
Common installation errors that show up later:
Error | What It Looks Like | When It Shows Up |
Over-driven nails | Buckling and waviness along panel runs | First summer heat cycle |
Insufficient expansion gaps | Panels pushing against trim, cracking at corners | Seasonal temperature swings |
Improper overlap | Wind-driven rain entering behind panels | First significant storm |
Starter strip not level | Visible misalignment at roofline | Immediately, from the street |
Skipped or partial house wrap | Moisture damage behind siding | 3–7 years post-installation |
Working Around Penetrations
Every utility box, hose bib, exterior light fixture, dryer vent, and HVAC line set penetrating the wall surface requires individual attention. Each one is a potential entry point for water if not properly integrated with the siding and moisture barrier.
The process for each penetration:
- Cut the siding panel to fit around the penetration — clean cuts, no gaps
- Apply flashing or flexible membrane around the penetration before the panel is nailed
- Caulk with an appropriate product rated for the material and climate — not general-purpose silicone
The caulk selection here matters more than most homeowners realize. Low-quality caulk at a penetration fails in three to five years in Pennsylvania's temperature swings. The right product — a paintable polyurethane or siliconized acrylic rated for exterior use — lasts considerably longer and costs very little more per tube.
Step 4 — Trim, Finishing, and Caulking
Trim Details That Determine How the Job Looks
Corners, window surrounds, door trim, and gable end details are where an experienced installation crew separates from a fast one. Panel runs are repetitive work. Trim is where judgment, precision, and attention to detail show up in the finished product.
Specifically:
- Corner posts must be plumb from top to bottom — a twisted corner post is visible from any angle
- Window trim must sit flat against the wall surface and integrate cleanly with the moisture barrier behind it
- J-channel at windows must be cut and mitered at corners — not butted — to prevent water entry at the joint
On a complex Chester County colonial or farmhouse exterior with multiple window configurations, trim installation can take as long as panel installation on the same elevation. That's appropriate. Rushing trim to finish a job in a day produces results that look rushed.
Final Caulking and Sealing
Caulk is applied at the end of the job — not throughout — so the siding has reached its installation temperature and position before joints are sealed. Locations that require caulking:
- All penetrations — utility, HVAC, lighting
- Trim-to-siding transitions where dissimilar materials meet
- Top termination points where siding meets soffit or frieze board
What does not get caulked on a properly installed vinyl siding job: the bottom of each panel course and the butt joints between panels in a horizontal run. These are intentional drainage gaps. Caulking them traps moisture rather than letting it drain.
Final Walkthrough — What to Check Before the Crew Leaves
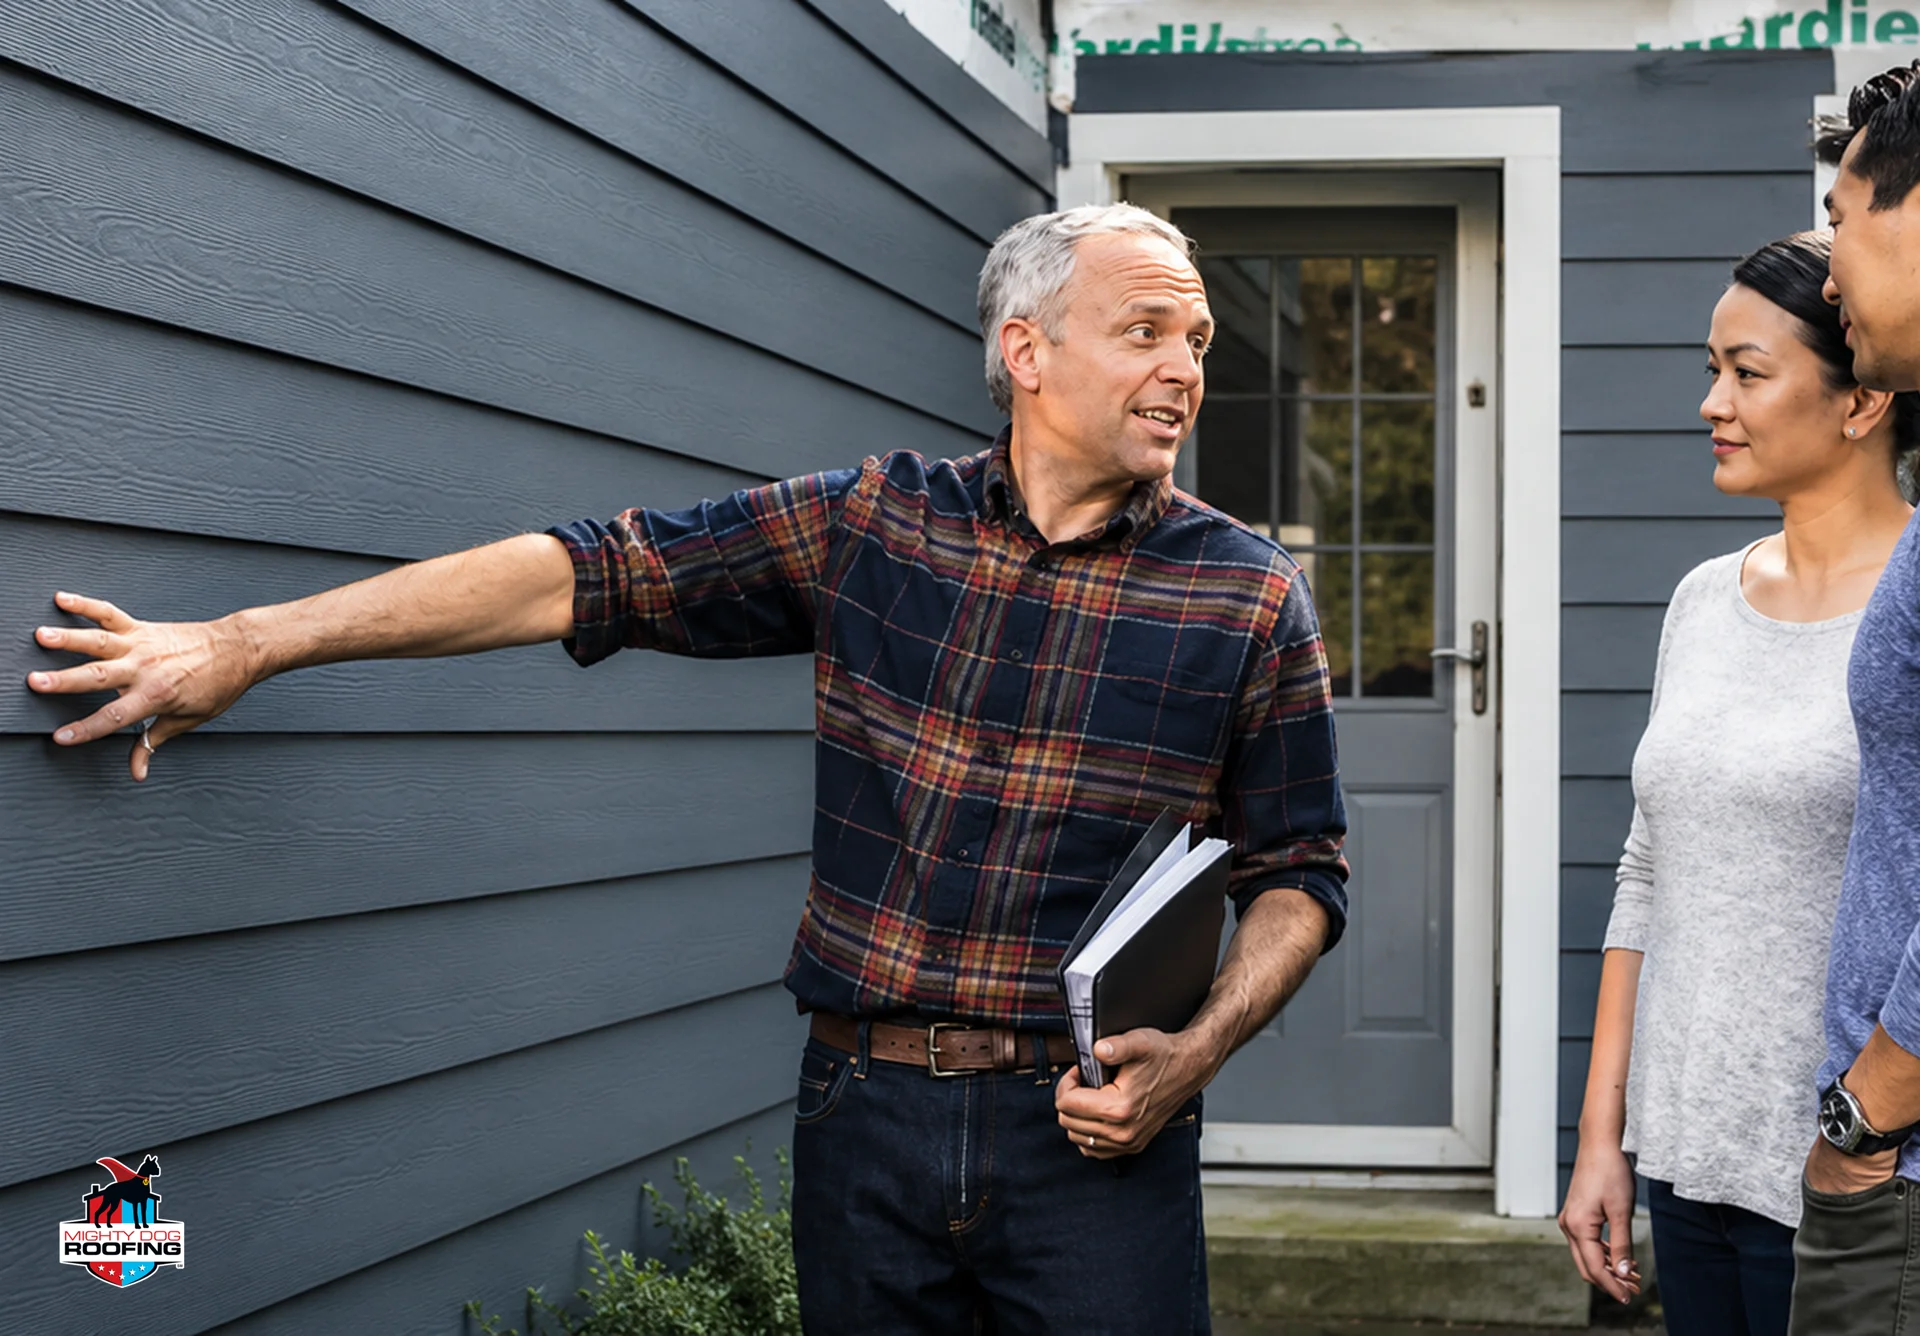
A final walkthrough with the project lead before the crew demobilizes is standard practice at Mighty Dog Roofing of Greater Chadds Ford and worth insisting on with any contractor. Walk each elevation and verify:
- Panel alignment is consistent — no visible waviness or misaligned courses
- All corners are plumb and trim is sitting flat against the wall
- Every penetration is caulked and finished — no raw cuts visible
- Expansion gaps are present at all J-channel and trim terminations
- Debris is cleared from the property perimeter
What to Watch for After the First Rain
The first significant rain after installation is the real test. Walk the perimeter during or after rain and note:
- Any water running down the wall surface below a window — indicates a flashing issue at that opening
- Water pooling at the base of the wall in a location where it didn't before — may indicate drainage path has changed
- Any panel that looks like it shifted or is no longer sitting flat — expansion-related if it appeared in the first heat cycle
Document anything unusual with photos and contact your siding contractor near you promptly. Most installation issues identified in the first 30 days are straightforward to address — and every installation from Mighty Dog Roofing of Greater Chadds Ford comes with a written workmanship warranty that covers exactly these situations.
Quality Is Invisible Until It Isn't
A siding installation done correctly looks exactly like one done carelessly — for the first few years. The difference shows up in year five when one wall is dry and the other has moisture behind it, or in year eight when one set of panels is buckling and another is sitting exactly where it was installed.
Understanding what each step involves is the most effective way to evaluate quality while the job is happening — not after. Get a free estimate from a residential roofing company near you and ask, specifically, how each of these steps is handled before you sign anything.