
What Is Roof Flashing? Types and Importance Explained
Roof flashing, a slender metal layer, redirects water from where your roof intersects with vertical surfaces such as walls or dormers.
Typically crafted from galvanized steel, copper, or aluminum, flashing surrounds vents, chimneys, and skylights. Flashing is essentially a water-tight seal that keeps water on the shingles rather than seeping into the roof deck.
Without proper flashing, water can infiltrate the crevices between walls and roofs, potentially causing damage to your home's interior.
Damaged or incorrectly installed flashing often leads to troublesome leaks, especially near chimneys, roof crickets, or dormers. Such issues, like leaks, are urgent roof repairs as they can result in wood decay and even structural instability.
Let’s explore some of the reasons flashing is essential before discussing the various types of roof flashing.
Why is Roof Flashing Important?
Flashing protects a roof’s seams, joints, and edges by redirecting the flow of rainwater away from these areas. It prevents water damage at the points of a roof where water is most likely to seep in and compromise the roof’s structural integrity.
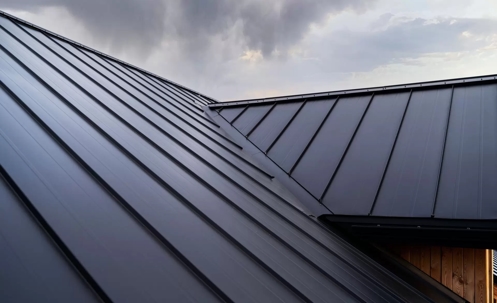
A roofing contractor usually installs flashing material over the roof underlayment and underneath the shingles of shingled roofs. For metal roofs, the flashing goes at the top of the panels. Metal flashing is important because it shields the critical areas of a roofing system to keep the home dry.
The 11 Most Common Types Of Roof Flashing
The different types of roof flashing vary based on where a professional roofing contractor installs them. Some roof features require a lot of flashing, while others only call for a little. Find the 11 most common kinds of roof flashing below.
1. Base Flashing
Base flashing is a piece of metal that sits where the roof plane and a vertical protrusion meet. Additional flashing gets installed over the base flashing, and the two flashing pieces are not fixed to each other, so they can move independently when the roof and protrusion expand and contract.
2. Step Flashing
Step flashing is a bent, rectangular piece of roof-to-wall flashing that protects joints. More flashing will be installed over the step flashing to ensure water gets directed away from the vulnerable crease between the roof and the vertical protrusion.
3. Chimney Flashing
Chimney flashing is a type of roof flashing that protects a chimney and roof by creating a waterproof seal to prevent water penetration and water damage. Chimney flashing often includes base flashing or step flashing.
4. Counter Flashing
Counter flashing is installed to prevent water from seeping behind the headwall and sidewall flashing. A roofing professional will install counter flashing over the step flashing to direct water away from vertical walls or other roof protrusions.
5. Drip Edge Flashing
Drip edge flashing is an angled strip of flashing that roofing contractors install over the top of the fascia. The purpose of drip edge flashing is to direct water away from the fascia board and into the rain gutters. A professional roofer will install drip edge flashing on the gables, rakes, and eaves of a roof.
6. Headwall Flashing
Headwall Flashing is a bent piece of flashing installed behind the siding of a vertical surface and over a course of shingles. Also called “L” flashing, headwall flashing receives its name based on where it gets installed. A headwall is the junction of a roof plane and a wall.
7. Valley Flashing
Valley flashing is a piece of flashing that protects the junction where two sloping roof planes meet by redirecting water away from the roof and toward the rain gutters. Roof valleys with damaged flashing are common places to find roof leaks because most rainwater eventually makes its way to the roof valleys during a rainstorm.
8. Gutter Apron Flashing
Gutter apron flashing is flashing that protects the eaves and rakes of a roof from water damage. The sloping face of the gutter apron flashing directs rainwater runoff into the rain gutter system. Unlike drip edge flashing, gutter apron flashing is installed under the shingles and over the back edge of the rain gutter to prevent water from seeping between the gutter and fascia.
9. Continuous Flashing
Continuous flashing is a long piece of flashing that provides waterproofing where the roof meets a vertical wall. Sometimes called “apron flashing,” continuous roof flashing directs water onto the shingles and away from the most vulnerable parts of a roof.
10. Skylight Flashing
Skylight flashing is a type of flashing that is designed to weatherproof the junction between the roof covering material and the skylight or roof window. Skylight manufacturers often include flashing with their products. Otherwise, a professional roofer can create custom flashing in aluminum sections to protect the roof and skylight from leaks and water damage.
11. Kickout Flashing
Kickout flashing is a type of flashing that directs rainwater away from the siding and into the rain gutter. A roofing contractor will install kickout flashing where the step flashing ends and the rain gutter begins.
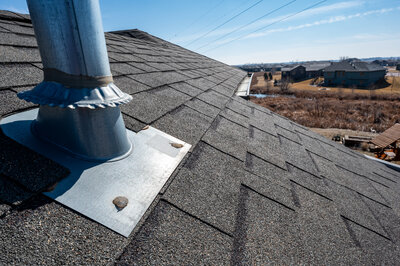
12. Vent Flashing
Vent flashing is a cylindrical piece of flashing that fits around a vent. Also called “plumbing vent boot flashing,” this type of flashing gets installed under the shingles. The slight increase in elevation causes rainwater to flow around the vent.
The Top 3 Roof Flashing Materials
Three different types of metal make up most of the metal flashing for roofing systems. In the past, lead was a popular choice for flashing, but most contractors stopped using it because it can poison rainwater runoff. Discover the current top three roof flashing materials below.
1. Steel
The most common roof flashing material is galvanized steel. Contractors prefer to use steel because it looks appealing and they can bend it to fit a home. Galvanized steel resists corrosion better than most types of steel that do not undergo the galvanization process.
2. Aluminum
Roofers sometimes use aluminum flashing because it is lighter than steel and easier to bend. However, aluminum needs a specialized coating when used in conjunction with masonry because it reacts and degrades when it comes into contact with alkaline substances, like salty sea air.
3. Copper
Some property owners may wish to install roof flashing made of copper because they own a copper roof or wish to match the flashing to other copper fixtures. Roofers occasionally install copper step flashing and counter flashing. Over time, copper flashing will turn green as it oxidizes.
Roof Flashing Sizes
When installing a new roof, professionals will select flashing of the correct size. The size and shape of the new flashing will depend on the various features of the roof deck and roof materials.
Step Flashing Size
Most step flashing measures 10 inches by eight inches. The flashing surface should extend over the shingle exposure by at least two inches to ensure a watertight seal. Some shingled roofs have roofing materials that mimic the appearance of slate and require flashing that measures 10 inches by 12 inches.
Vent Flashing Size
Plumbing vents require flashing to protect the vulnerable edge of the roof penetration. The flashing should measure slightly larger than the vent pipe’s diameter to fit snugly around the entire protrusion.
How To Install Step Roof Flashing In 5 Steps
Installing flashing should always be left to experienced roofers. For reference, roofing experts will adhere to the following five steps to install roof flashing.
Step One: Install Kickout Flashing
A roofer will place the kickout flashing against the wall and at the roof’s edge to ensure it fits. If no adjustments are needed, the roofer will apply roofing cement and install the kickout so it leads directly to the rain gutter below.
Step Two: Install The First Piece Of Step Flashing
Next, the roofer will install the first piece of step flashing over the base flashing, directing water straight to the kickout. Two nails and some roofing cement will fix the step flashing in place. The roofer will nail the step flashing into the roof deck so the shingles will cover the nails.
Step Three: Install A Shingle Over The First Piece Of Flashing
A roofing expert will apply roofing sealant to the flashing before laying down a shingle and nailing it to the roof deck. The shingle should cover the nails in the base of the step flashing.
Step Four: Complete The Entire Course Of Shingles
The roofer should then install the entire course of shingles, nailing each shingle to the roof decking while progressing along the entire width of the roof facet. Each nail should sit high enough to allow the next course of shingles to cover it.
Step Five: Repeat Steps One Through Four
A roofing expert will install the next piece of step flashing and allow it to overlap the previous piece by at least three inches. The contractor will apply the roofing sealant, place the flashing, and nail it in place before laying down the next course of shingles. The roofer will repeat these steps to reach the top of the roof.
When To Call The Professionals To Repair Roof Flashing
Some homeowners feel unsure about whether they should call their local residential roofing company to fix their flashing. Many of them do not even know what flashing is. For those homeowners who do understand what their flashing does, they can look for the following signs that their flashing needs repairs:
- Roof leaks and water damage
- Missing nails
- Rust or corrosion
- Dried out, cracked, or missing sealant
- Warped flashing
- Holes in the flashing
- Loose flashing
If homeowners see any of these signs, they should contact their local roofers to schedule an inspection. Most of the time, an experienced roofer will suggest a repair to ensure the old flashing continues to protect the roofing system. In more severe cases, a flashing replacement may be the best solution.
How Much Does Roof Flashing Cost?
Roof flashing costs between $300 and $1,500 depending on the flashing material, roof size, number of protrusions, and the length of the valleys where the two sloping roof planes meet. The labor needed for proper installation of roof flashing costs between $25 and $100 per hour, for an average of about $75 per hour.
FAQ
Is Roof Flashing Necessary?
Roof flashing is necessary because it plays a vital role in directing water away from walls, chimneys, and valleys. In many ways, roof flashing is one of the most crucial roofing materials because of the protection it gives a roof deck. Flashing keeps water on the roof surface and guides it to the rain gutter.
What Is The Purpose Of Flashing?
The purpose of flashing is to protect a roof system against harsh weather, especially rain, sleet, and snow. It prevents water from penetrating the roof’s surface and damaging the roof deck by directing water away from seams, joints, openings, and cracks in the roofing material.
What Does Flashing On A Roof Look Like?
Flashing on a roof looks like sheet metal securely attached to the roof and the side of a chimney, wall, or other vertical surface. It can look like shiny metal rectangles or long, painted strips of thin material. However, in most cases, flashing looks like brushed metal, especially if a roofing professional uses steel that has undergone galvanization.
What Happens If You Don’t Have Roof Flashing?
If you don’t have roof flashing, the risk of leaks increases, placing the structural integrity of your new roof in danger. Roofers install roof flashing to prevent a cascading effect where a small leak creates water damage, which can lead to mold growth and warping of the underlying roof structure.
What Roof Flashing Is | Mighty Dog Roofing
What is roof flashing? Now that we have answered that question contact your local roofing contractor to discuss your next roof installation, including your roof flashing options.
Call Mighty Dog Roofing at (833) MIGHTY 4 for a free consultation regarding your new roof. We offer financing options!